To Read

Read posts categorised as ‘To Read’ in the PermaRoof UK library. We offer innovative solutions to the DIY, trade and commercial sectors.

Talk to us today and find out how we can help you with your project. With a wide range of building and flat roofing products, installation guides, video tutorials and more, PermaRoof UK is a one-stop-shop for all your projects. In addition to reading our blog we recommend you connect with us on Facebook and LinkedIn for even more updates.
Fitting a Gutter Edge Backplate

2024-02-19T11:58:19+00:00

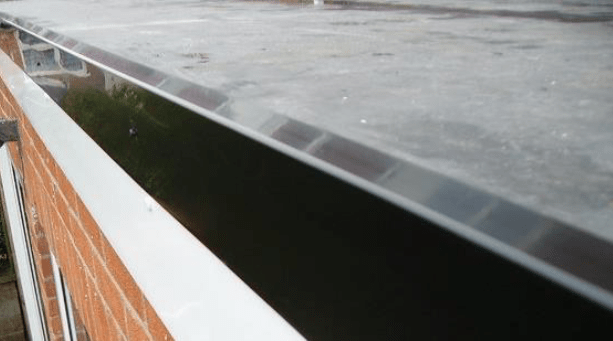
Fitting a Gutter Edge Backplate   In this guide, we will show you how to install the gutter edge backplate. This is a vital part of the trim system that ensures a watertight seal around your flat roofing installation. Ensuring a completely watertight seal can add to the longevity of your roofing and using a good quality trim system is crucial. When installing EPDM membrane, with a life expectancy of more than five decades, making sure you get the most from your project over the lifespan leads to better cost vs. value. Step One We’re going to remove the existing EPDM sheet that’s overhanging of the cutter edge. Step Two Temporarily place the gutter edge back plate in position, to

Installing EPDM Trim Detail

2024-09-25T08:11:12+00:00

Installing EPDM Trim Detail In this installation guide, we will demonstrate how to install the Permaroof EPDM trim detail to complete and seal your flat roofing project. Once your EPDM roofing membrane has been installed, a good quality flat roof trim can perfectly seal the installation. This ensures the best chance of success over the expected exceptional lifespan of EPDM roofing systems of more than 50 years. Qualified and experienced trainers will show you how to tackle gutter edges and install back plates, how to deal with kerb edges and create a watertight seal across the entire installation. Note that it is preferable to install part of the trim system before the membrane is laid. See below. Gutter edges

Removing Creases from EPDM Membrane

2024-02-19T13:29:14+00:00

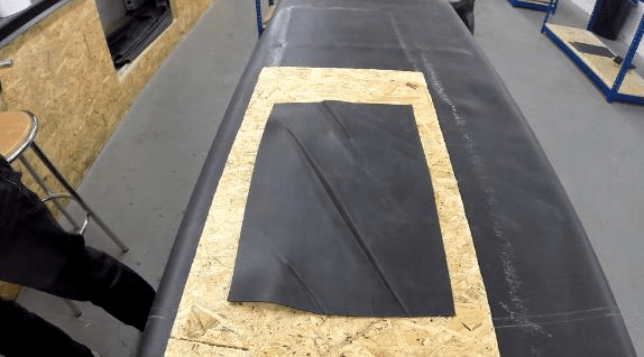
Removing Creases from EPDM Membrane In this tutorial, we’re going to show you how to effectively remove creases from EPDM membrane. Step One Lay out the creased EPDM membrane and smooth onto a flat working surface. Fig 1: Laying out the creased EPDM membrane. Step two Using a heat gun, gently heat up the surface of the EPDM membrane and smooth out the creases using a silicon roller. Fig 2: Heating the EPDM membrane and smoothing with the silicon roller. Take care not to burn the EPDM! Step three Work quickly and efficiently across the creased area without remaining in one place for too long. Fig 3: Working quickly and evenly across the membrane. IMPORTANT: Only use a heat gun,

Preparing a Flat Roof for EPDM Application

2024-02-19T13:30:46+00:00

Preparing a Flat Roof for EPDM Application Preparing your flat roof before installing EPDM can be one of the most important steps of the entire process. Incorrectly preparing the roof can lead to failure – through poor adhesion. In this guide, we will offer advice about the handling and storage of materials, the tools you need, product information and weather and substrate considerations. If you need any further assistance, call the expert teams and we’ll support you every step of the way.   Material storage and handling It is essential the roofing contractor is aware of proper storage of roofing materials. The following are some storage recommendations for handling these products. Read labels on all adhesive, primer and sealant containers.

QuickSeam Repair Kit Installation Guide

2024-02-19T13:33:17+00:00

QuickSeam Repair Kit Installation Guide Included within the kit will be: 1x QuickSeam Repair Flashing 1x 0.5L QuickPrime Plus Primer 1x silicon roller 1x QuickScrubber handle with pad Other useful tools not included: Scissors, tape measure and crayon       Step 1: Locate the damage to the EPDM and clean the surface to remove any loose debris. Step 2: Place the QuickSeam Repair Flashing onto the centre of the damage and mark a circle around the patch allowing for an extra 25mm all the way around it. Step 3: Stir the QuickPrime Plus Primer thoroughly with a mixer to prepare it for application, and apply it with the Quickscubber pad within the marked area on your EPDM. Step 4:

EPDM Through-wall Outlet Detail

2024-02-19T13:35:08+00:00

EPDM Through-Wall Outlet Detail Using the EPDM outlet accessory In this Permaroof installation guide, we will demonstrate the installation process for through-wall outlet detail using the EPDM Thru Wall Outlet accessory from Permaroof. This method effectively seals and protects internal drain details from water ingress. Once installed correctly, the EPDM Thru Wall Outlet leaves you with a long-lasting, high performance result, perfect for EPDM flat roofing systems. The longevity of EPDM flat roofing can be fully supported using the right accessories for your projects. Ensure a watertight, reliable seal for the long term at critical points such as corners and junctions between roofing and parapet walls. Step One The EPDM membrane should be adhered to the substrate and upstand wall

Pipe flashing detail (Quickseam Formflash)

2024-02-19T13:36:51+00:00

Pipe flashing detail (Quickseam Formflash) As with any detail, make sure the area is clean and dry. There are 3 pieces of Quickseam Formflash needed to complete this detail, two of which are the same size for the base area, and one to wrap around the pipe. With the crayon, mark out the area to be primed at least 95mm from the pipe. Also mark out 75mm distances as a guideline for applying the Quickseam Formflash. Apply the Quickprime Plus to the outer markings around the pipe, and also approx. 75mm up, and wait until tacky. Round the corners off the Quickseam Formflash, and mate onto the deck in line with the 75mm markings. On the reverse of the tape,

Pipe flashing detail (pre-fabricated pipe boot)

2024-02-19T13:38:41+00:00

Pipe flashing detail (pre-fabricated pipe boot) As with any detail, make sure the area is clean and dry. Measure the diameter of the pipe… ...and cut out the same diameter on the pipe boot flange… Stretch the boot over the pipe and offer into position onto the deck. With the crayon, mark out the area to be primed approx. 20mm beyond the flange base. Lift the boot upwards to apply the Quickprime plus onto the deck Once the Quickprime Plus becomes tacky, place the boot back into position on the deck and peel away the complete backing paper from underneath. Use the silicon roller to secure the boot to the deck Pull the top of the boot around the neck

Installation of Internal Drain Detail

2024-02-19T13:39:54+00:00

Installation of Internal Drain Detail In this Permaroof installation guide, we will demonstrate the installation process for internal drain detail using the EPDM drain outlet accessory. This method effectively seals and protects internal drain details from water ingress. Once installed correctly, the EPDM drain detail leaves you with a long-lasting, high performance result, perfect for EPDM flat roofing systems. Step One The EPDM membrane should be fully adhered to the substrate and the membrane cut away to reveal the drain hole. Step Two Insert the drain outlet... Step Three Mechanically fix the outlet to the roof deck using V-plates and All-purpose fasteners. Step Four Apply Quickprime plus to the area a minimum of 100mm beyond the perimeter of the flange.

Forming an Internal Corner Detail

2024-02-19T13:41:23+00:00

Forming an Internal Corner Detail In this tutorial, we’re going to show you how to form an internal corner detail using EPDM, Quickprime Plus and the penny roller. Step One Prepare the Quickprime Plus by mixing it sufficiently, according to the instructions, and decanting it into a small container, as you only need to use a small amount at a time. Put the lid firmly back on the tin afterwards. Fig 1: Decanting mixed Quickprime Plus into a small container. Step two Tie the little piece of EPDM onto the back wall. This keeps the sheet membrane out of the way while the bonding adhesive is applied. Fig 2: Tying the sheet membrane temporarily out of the way. Step three

Go to Top