Installing EPDM Membrane

Read posts categorised as ‘Installing EPDM Membrane’ in the PermaRoof UK library. We offer innovative solutions to the DIY, trade and commercial sectors.

Talk to us today and find out how we can help you with your project. With a wide range of building and flat roofing products, installation guides, video tutorials and more, PermaRoof UK is a one-stop-shop for all your projects. In addition to reading our blog we recommend you connect with us on Facebook and LinkedIn for even more updates.

PERMAROOF IN A BOX®FITTING INSTRUCTIONS

2025-08-11T15:10:25+00:00

PERMAROOF IN A BOX® FITTING INSTRUCTIONS STEP 1. Open the box to check contents, and familiarise yourself with the components. STEP 2. Place membrane over roof, ensuring you have full coverage. Allow to relax for 30 minutes. Step 3. Fold half the membrane back on itself and apply water based adhesive to the roof deck using the mini roller enclosed. Repeat the process on the other half. A pair of protective latex gloves are enclosed for cleaner application. Broom over surface of membrane to ease out any creases or bubbles. STEP 4. Trim off any excess rubber sheet around the edges, leaving approx. 50mm overhang IMPORTANT. There are various shed designs along the water run off edge as shown

Removing Creases from EPDM Membrane

2024-02-19T13:29:14+00:00

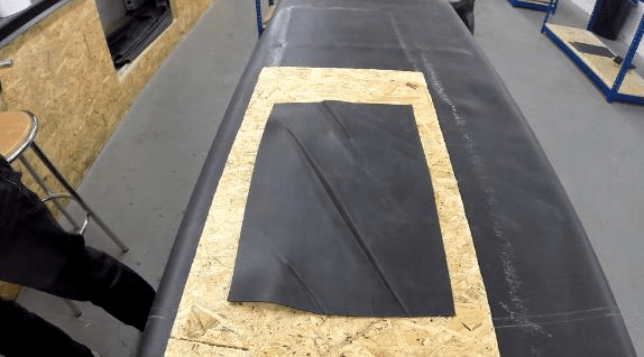
Removing Creases from EPDM Membrane In this tutorial, we’re going to show you how to effectively remove creases from EPDM membrane. Step One Lay out the creased EPDM membrane and smooth onto a flat working surface. Fig 1: Laying out the creased EPDM membrane. Step two Using a heat gun, gently heat up the surface of the EPDM membrane and smooth out the creases using a silicon roller. Fig 2: Heating the EPDM membrane and smoothing with the silicon roller. Take care not to burn the EPDM! Step three Work quickly and efficiently across the creased area without remaining in one place for too long. Fig 3: Working quickly and evenly across the membrane. IMPORTANT: Only use a heat gun,

Preparing a Flat Roof for EPDM Application

2024-02-19T13:30:46+00:00

Preparing a Flat Roof for EPDM Application Preparing your flat roof before installing EPDM can be one of the most important steps of the entire process. Incorrectly preparing the roof can lead to failure – through poor adhesion. In this guide, we will offer advice about the handling and storage of materials, the tools you need, product information and weather and substrate considerations. If you need any further assistance, call the expert teams and we’ll support you every step of the way.   Material storage and handling It is essential the roofing contractor is aware of proper storage of roofing materials. The following are some storage recommendations for handling these products. Read labels on all adhesive, primer and sealant containers.

EPDM Shed Roof Kit Installation Guide

2025-08-11T15:04:27+00:00

EPDM Shed Roof Kit Installation Guide How to Fit an EPDM Shed Roof Kit In this guide, we will demonstrate the application process for fitting your PermaRoof EPDM shed roof kit. Our shed roof kits include everything you need to replace the covering on timber shed roofing. Fast and easy to apply, ideal for DIY. Your EPDM kit should be applied to a clean, dry and dust-free surface for the best results. Carefully prepare your shed roof by fully removing the old covering and any oil or grease spots. NB Timber shed battens are not included as a part of the EPDM roofing kit. You may choose to purchase new battens or conserve the old ones (if they are

EPDM Membrane – Mechanically fixed application

2024-02-19T08:05:16+00:00

Mechanically fixed application It is always preferable to remove the existing waterproofing from the main part of the roof, but if you are satisfied the roof deck is in a sound structural condition, only the perimeter edge waterproofing, upstands and loose materials, e.g, felt chippings, have to be removed. Once the remaining surface has been properly swept, the geotextile undercushion can be laid onto the roof surface. This protects the membrane from the potentially rough substrate.   At all perimeter edges and upstands, the RUSS (Reinforced Universal Securing Strip) needs to be mechanically attached to the substrate for the membrane to adhere to. The geotextile undercushion must be secured underneath these strips using V-plates and All-purpose fasteners. It is important

Fully Adhered EPDM Application

2025-07-22T14:51:44+00:00

Fully Adhered EPDM Application Once the substrate in properly prepared, the EPDM membrane can be laid out onto the roof and positioned. Make sure enough membrane overhangs the roof perimeters and upstands, allowing to be trimmed later. When EPDM membrane is laid in-situ, it can take around 30 minutes to relax. In cold weather conditions, this waiting time will be extended and any folds that are sometimes present in the membrane can take longer to dissipate. The membrane is applied from the centre of the roof out towards the perimeter edges. At these edges and upstands, fold excess membrane back onto the roof. This ensures any wrinkles are removed, making the membrane easier to apply. Then fold the sheet

Waterproofing a Flat Roof with RubberCover

2025-09-30T13:17:48+00:00

Waterproofing a Flat Roof with RubberCover PermaRoof UK can offer you a fantastic alternative to felt roofing with the innovative RubberCover EPDM rubber flat roof. Waterproof a flat roof quickly and easily with a one-piece system that requires few tools and cold application! PermaRoof UK is the UK's largest provider of RubberCover membranes and products, providing a long-term solution to leaking flat roofs. The EPDM flat roofing membranes are manufactured from a synthetic rubber compound and have been used on commercial and industrial roofing worldwide for more than 25 years. Today, the high-performance, proven system is available for waterproofing residential flat roofing and is fast growing in popularity as it consistently outperforms traditional felt roofing. The unique compound of

How to Apply EPDM to Perimeter Edges

2021-10-28T14:32:53+00:00

How to Apply EPDM to Perimeter Edges A detailed look at how to correctly and securely apply EPDM roofing sheet membrane to the edges of a flat roof. Follow our guide that walks you through each step from applying the adhesive to the roofing membrane to tips to ensure there are no trapped air bubbles. EPDM is fast growing in popularity due to its superior weatherability and ease of application. Unlike traditional felt and lead flashing roofing systems, EPDM sheet membranes are flexible and long lasting, bringing lower maintenance costs over the lifetime of the flat roof.

How to Fit EPDM Membrane to Upstand Walls

2025-07-10T12:36:39+00:00

How to Fit EPDM Membrane to Upstand Walls Find out how to fix EPDM membrane to upstand walls at the edges of your flat roof. Detailed and clear, the video shows our how-to-guide to easily deal with the application of membranes to angle changes that will take only minutes to complete. With a system so much simpler than traditional roof felting, RubberCover EPDM offers flexibility and longevity to your flat roofing project - large or small. Cold application simplifies to process of installing a flat roof and, fitted in one piece, the EPDM roofing system is hard to fault for waterproofing, flexibility and weathering properties. Where felt roofing will dry out and crack over a relatively short period of

Removing creases from RubberCover EPDM

2025-07-10T12:54:16+00:00

Removing creases from RubberCover EPDM Sometimes, during transit or if your EPDM has been stored for some time, it develops creases. Usually, laying out the membrane flat and resting it for 30 minutes will ensure small transit creases drop out. If heavier creases don’t drop out, they need a little extra attention. Our video demonstrates just how to remove the more stubborn creases from your EPDM membrane in a clear, step-by-step method. Instructions Lay out the creased EPDM on a workbench or other suitable flat surface. Make sure the work area is free from debris. Take a heat gun and a silicone EPDM roller and gently warm the affected area of the membrane on a low heat setting. Take

Go to Top