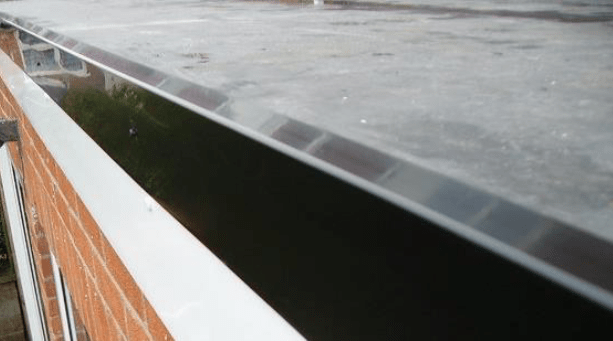
Installing Flashing & Details

Read posts categorised as ‘Installing Flashing & Details’ in the PermaRoof UK library. We offer innovative solutions to the DIY, trade and commercial sectors.

Talk to us today and find out how we can help you with your project. With a wide range of building and flat roofing products, installation guides, video tutorials and more, PermaRoof UK is a one-stop-shop for all your projects. In addition to reading our blog we recommend you connect with us on Facebook and LinkedIn for even more updates.

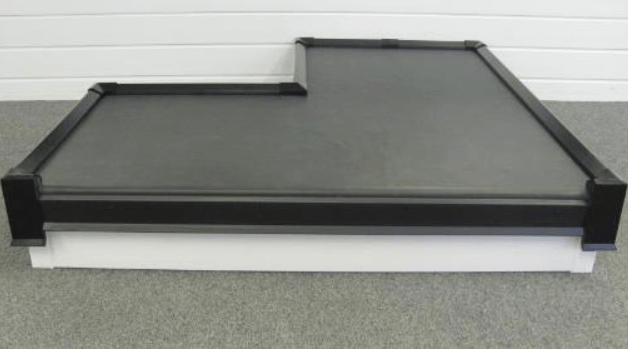
Flashing an Internal Corner

2024-02-29T09:55:10+00:00

Flashing an Internal Corner In this tutorial, we’re going to show you how to finish off an internal corner detail using 9” FormFlash. Step One Cut a piece of the 9” FormFlash out. Offer it up to the internal corner as shown in Fig 1. Draw around the patch leaving an extra gap all around the edge, which is where the Quickprime Plus adhesive will be applied. Step two Apply Quickprime Plus to the area using the small pad. The patch is going to make sure that the top edge of that internal corner, where it goes into the chase on this example, is completely watertight. Wait for the Quickprime Plus to tack off. Step three Remove the backing

How to Install PermaRoof Plus Trim Detail

2024-02-19T14:13:42+00:00

How to Install PermaRoof Plus Trim Detail n this guide, we will demonstrate the installation process for Permaroof Plus trim detailing on your EPDM roofing system. All Permaroof demonstrators are qualified and experienced roofing professionals. Edge trims help to completely seal and protect the gutter and kerb edges around the roofing, trapping the membrane securely and protecting it from the elements. It can also improve the aesthetic value of the installation considerably. Let us can help you with high quality Permaroof Plus edge trim with fast delivery across the UK. We also stock a range of other trim in our online store.   Fitting Instructions When fitting Permaroof Plus trim, it is easier to install the gutter edge backplate before

Metal Edge Trim Detail for EPDM Roofing

2024-02-19T13:13:28+00:00

Metal Edge Trim Detail for EPDM Roofing In this guide, we will demonstrate the installation process for metal edge trim detailing on your EPDM roofing system. All Permaroof demonstrators are qualified and experienced roofing professionals. Edge trims help to completely seal and protect the gutter and kerb edges around the roofing, trapping the membrane securely and protecting it from the elements. It can also improve the aesthetic value of the installation considerably. PermaRoof can help you with high quality metal edge trim with fast delivery across the UK. We also stock a range of other trim in our online store. How to install metal edge trim detail Once the roof is watertight, it needs to be finished with metal edge

Installing PermaRoof Wall Flashing

2024-02-20T17:51:14+00:00

Installing PermaRoof Wall Flashing In this tutorial, we’re going to show you how to install the new PermaRoof wall flashing using Ultrabond in just six easy-to-follow steps. Wall flashing is an important part of the process of installing EPDM roofing systems where there is an upstanding wall, such as with a flat roof extension project. Step One Grind out the chase using an 8mm thickness blade. Step Two Bond the EPDM membrane up the wall, leaving it just short of the chase. Step Three Apply Permaroof Ultrabond to the reverse of the Permaroof Wall Flashing, ensuring a continual 5mm bead. For the best results, use the Ultrabond foil applicator and refill pack, as it offers high levels of control and

Fitting a Gutter Edge Backplate

2024-02-19T11:58:19+00:00

Fitting a Gutter Edge Backplate   In this guide, we will show you how to install the gutter edge backplate. This is a vital part of the trim system that ensures a watertight seal around your flat roofing installation. Ensuring a completely watertight seal can add to the longevity of your roofing and using a good quality trim system is crucial. When installing EPDM membrane, with a life expectancy of more than five decades, making sure you get the most from your project over the lifespan leads to better cost vs. value. Step One We’re going to remove the existing EPDM sheet that’s overhanging of the cutter edge. Step Two Temporarily place the gutter edge back plate in position, to

Installing EPDM Trim Detail

2024-09-25T08:11:12+00:00

Installing EPDM Trim Detail In this installation guide, we will demonstrate how to install the Permaroof EPDM trim detail to complete and seal your flat roofing project. Once your EPDM roofing membrane has been installed, a good quality flat roof trim can perfectly seal the installation. This ensures the best chance of success over the expected exceptional lifespan of EPDM roofing systems of more than 50 years. Qualified and experienced trainers will show you how to tackle gutter edges and install back plates, how to deal with kerb edges and create a watertight seal across the entire installation. Note that it is preferable to install part of the trim system before the membrane is laid. See below. Gutter edges

Installation of Internal Drain Detail

2024-02-19T13:39:54+00:00

Installation of Internal Drain Detail In this Permaroof installation guide, we will demonstrate the installation process for internal drain detail using the EPDM drain outlet accessory. This method effectively seals and protects internal drain details from water ingress. Once installed correctly, the EPDM drain detail leaves you with a long-lasting, high performance result, perfect for EPDM flat roofing systems. Step One The EPDM membrane should be fully adhered to the substrate and the membrane cut away to reveal the drain hole. Step Two Insert the drain outlet... Step Three Mechanically fix the outlet to the roof deck using V-plates and All-purpose fasteners. Step Four Apply Quickprime plus to the area a minimum of 100mm beyond the perimeter of the flange.

Wurth Fixings – High Quality Roofing Screws

2023-07-25T12:38:25+00:00

Wupofast Countersunk Pozi Screws Box Size 250 Available in two sizes 4 X 70mm and 4 x 60mm Yellow Chromate.Hardened Steel. Suitable for: all types of wood , MDF, laminated & waterproof chipboards, wood based materials. 25 degree point for accurate placing on hard surfaces. Plastic anti-friction coated. Sharp angled thread turns, create easy drive in. Product code: ONS82 Buy Now

Gutter Edge Drip Plate to a Flat Roof – Video Guides

2021-11-24T13:19:53+00:00

How to Fit a Gutter Edge Drip Plate to EPDM Flat Roofing Super-simple how-to guide for fitting a gutter edge drip plate to flat roofing. Create a perfect seal and enhance the aesthetics and kerb value of the entire project. Watch our video as the contractor demonstrates how easy the PermaRoof UK gutter edge drip plate is to install. We stock all types of roofing trim in our online store and offer fast UK delivery to all our trade and DIY customers. The teams are on hand if you need help with your order, call us today on 01773 608 839 or use the live chat for a quick query. More about flat roof trim

How to Apply Flashing to External Corners

2023-09-21T19:39:50+00:00

How to Apply Flashing to External Corners Find out how to apply flashing to external corners using PermaRoof UK FormFlash tape for EPDM flat roofing projects. Our instructional video clearly demonstrates the ease of flat roofing when using EPDM sheet membranes and related products. RubberCover is an ideal alternative to felt roofing and lead flashing. Using cold application techniques, the installation of flat roofing is so easy and is suitable for any flat roof surface. With just a few special tools (PermaRoof UK rollers and a pad!) it is really possible for you to create a stunning flat roofing project. EPDM sheet membranes have superior weathering capabilities and unique longevity with an expected lifespan of more than 50 years.

Go to Top