


Let’s be honest, EPDM roofs are fairly upfront about what makes them happy. The epitome of low maintenance, they’re not needy – but they do expect to be treated with respect from the off.
Give them careful prep, thoughtful installation, and boom… you’ll lock in a decades-long commitment, forged with strong bonds and the kind of trust that weathers anything.
Since roofs can’t grab you by collar and say, “Fit me right and I’ll stick by you for decades,” we’re stepping in to translate the secret, unfiltered asks of your EPDM.
Key Takeaways
- Good Foundations Please! EPDM membrane only works as well as the surface it’s stuck to. No debris, dampness or sharp objects.
- Watch the Weather. Adapt your adhesive and aftercare according to the temperature, wind and rain conditions.
- Full System … Go! Engineered to ensure harmony, full-system roofing solutions include perfectly paired materials. Pairing budget adhesive with quality EPDM is a recipe for disaster.
- Joining Options. Where two rolls meet, bring them together with either 3″ seam tape or 6″ cover strip tape depending on the type of join. Although both tapes have peel-off backs, you’ll still need primer to activate them.
- Drainage and Ponding Prevention. EPDM is renowned for its reliable water-resistance, but that doesn’t mean it’s invincible. Give water and condensation a clear escape route with vents, free-flowing drains and a correct slope for natural run-off.
- Corners, Edge Trims and Penetrations. Patience, care and meticulous attention to detail are essential to these areas. Use a well-placed bead of sealant or square of butyl tape when attaching trims, to a neatly folded ‘pig’s ear’ for internal corners.
- Don’t Look Back in Anger. Your rubber’s down, you’ve flashed the upstand wall, the gutter drip’s on and you’ve finished like a pro. Nonetheless, check every seam, flashing strip, penetration and patch to make sure everything’s truly sound.
1. Good Foundations Please!
EPDM membrane only works as well as the surface it’s stuck to.
Debris, dampness, sharp objects, all of these can sabotage what should be a lasting relationship, weaken the bond and lead to future upset. Your roof is silently hoping you take time to prep, double check, and smooth everything over so your EPDM can relax, knowing it’s sealed for decades of leak-free service.
2. Watch the Weather
Blowing, hot or cold? The perfect fit can be a temperamental affair in adverse weather, but you can avert drama by being adhesive-savvy and adapting your approach to suit.
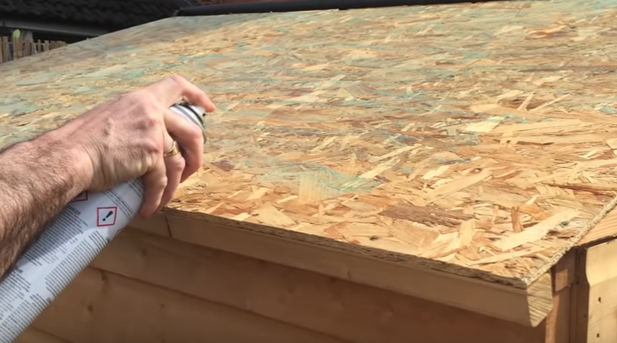
Water-based deck adhesive bonds best in mild temperatures when adhering to traditional ply or OSB. Realistically though, the great British weather rarely obliges.
If thermometers hit 23°C or above, water-based adhesive will dry too quickly. Stay cool and replace it with bonding (contact), applying to both membrane and deck, allowing it to fully tack off before installing EPDM.
Premature fitting can lead to trapped gasses and unsightly ‘brain bumps’ in the rubber, and although most small air bubbles (not moisture) will dissipate with sunlight and heat, a little patience when fitting can stop them in their tracks.
Feeling frosty? Don’t let your roof give you the cold shoulder. If it’s below 5°C, or expected to dip below 5°C in the 48 hours after fit, beat the freeze and switch water-based glue for contact adhesive.
Blowing up a storm? Don’t be afraid to temporarily ballast to settle your EPDM and stop it flying off.
3. Full System … Go!
Think cheese and wine. You wouldn’t pair a posh Pinot Noir with a cheese triangle, so it’s fair to expect your rubber to snub a sub-standard adhesive.
Engineered to ensure harmony, our full-system roofing solutions include everything from Elevate RubberCover EPDM, glues and primer, to flashing tapes, drainage and insulation … you could say they’re made for each other!
Budget in the wrong areas, particularly adhesives, and not only are you off to a shaky start, you’re asking for trouble long term when your roof realises it’s been cheated on.
Stick with a full system approach and you’re guaranteed the perfect match.
4. Joining Options
Where two rolls meet, bring them together with either 3″ seam tape or 6″ cover strip tape.
Although both tapes have peel-off backs, you’ll still need primer to activate them.
6” Cover Strip Tape
- Leave a straight-edge 5mm gap between the two pieces you’re joining.
- With rubbers adhered side by side, lay a 6” cover tape strip in-situ evenly across the join
- Mark 20mm past each side with a white crayon
- Prime within the marks and allow to tack off, no smearing or strings
- Lay tape parallel to the marks, keep taut, overlapping by 50mm if restarting
- Prime over any tape-to-tape overlaps and overlay any joints with 9” FormFlash
- Silicon roller: across the joint first, then along it
3” Seam Tape
- Ensure the leading edge overlaps the lower sheet by at least 100mm
- Mark a line 18mm from the overlap edge using a white crayon (an 18 mm batten helps)
- Prime 100mm wide along the seam and on the overlapping membrane, and allow to tack off
- Apply tape, keeping it taut, edge aligned to the crayon line
- Overlap new sections by 50mm if you cut or start a new roll
- Silicon roll
- Flap back the leading edge – distance to brown paper tape edge should be around 18mm
- Peel the tape backing paper towards you, letting the primed edge fall onto the tape.
- Flatten with your hand as you peel, then silicon roller the entire seam, eliminating air pockets
Top Seam Tape Tip: When a seam joins an adjacent membrane, install a T-piece detail to prevent water ingress.
5. Drainage and Ponding Prevention
EPDM is renowned for its reliable water-resistance, engineered to handle rain, snow and even standing water without rotting, cracking or dissolving. BUT that doesn’t mean it’s invincible.
Pooled water can still trigger problems down the line – don’t let it be your roof’s nemesis.
Take extra weight for example. Prolonged pooling can strain the roof deck, causing structural issues, whilst less than perfect seams and penetrations may shrug off a quick shower but fail the test of time under standing water.
Algae, dirt or debris buildup can make the surface slippery and hide damage, whilst trapped water can expand in cold weather, subjecting edges or sealants to freeze-thaw stress.
Your roof relies on you to give water and condensation a clear escape route with vents, free-flowing drains with leaf guards, and a correct slope for natural run-off.
6. Corners, Edge Trims and Penetrations
These are your EPDM’s emotional hot spots. From a well-placed bead of sealant or square of butyl tape when attaching trims, to a neatly folded ‘pig’s ear’ for internal corner flair, your roof wants you to roll out the red carpet, every time.
The ultimate VIP treatment – patience, care and meticulous attention to detail – means no drama, no water and no heartbreak, just years of leak-free finesse.
7. Don’t Look Back in Anger
Your rubber’s down, you’ve flashed the upstand wall, the gutter drip’s on and you’ve finished like a pro with PermaRoof edging trim, corners and caps.
It might look a million dollars, but give it a bright-light once-over – check every seam, flashing strip, penetration and patch to make sure everything’s truly sound, then sit back and enjoy the peace of mind that comes with knowing.
Frequently Asked Questions about EPDM Roof Installation
No, you should wait for a dry day to install EPDM as you cannot apply the adhesive or afford to trap moisture between membrane and roof deck.
EPDM can be adhered to all types of timber roof substrates and onto OSB or plywood for the best results. It is typically adhered to wood roof decks using a water-based adhesive. It can be adhered to other surfaces such as a tissue-faced insulation board using a contact bonding adhesive.
The tools needed to install EPDM are as follows:
- Rollers – to apply the adhesive to the deck
- Soft brush or broom – to ensure 100% adhesion with no air pockets
- Penny roller and 50mm silicone seam roller – to dress in the details and any seams
Bubbles and wrinkles in EPDM membrane can be due to the application of either not enough adhesive or too much in certain places. Blistering can also occur if temperatures exceed the mid-20s during installation. This causes condensation on the membrane underside, which can prevent a full bond.
It is recommended that all existing roof covering is stripped back to the deck or substrate before installing EPDM. Suitable for installation over a range of substrates, use water-based adhesives for timber and bonding adhesive for other materials, such as concrete.
Find our roof preparation guide to help ensure a clean, dry installation surface here.
Yes. We can connect home and business owners with reliable, trained and vetted professional roofers via our National Installer Network.
Find a contractor in your local area here or give the team a call to find out more.
For most projects, we can custom-cut a single sheet of EPDM that requires no seams. RubberCover can be cut in sheets up to 15m x 60m and this is one of the benefits of the system for ease of installation.
However, if EPDM does need to be joined, it is made straightforward with the use of EPDM seam tapes. There are two ways of joining EPDM using 6” tape and 3” tape with QuickPrime Plus primer. See our installation guides for a step-by-step tutorial.
Pipe extrusions on flat roofs can be easily handled using an EPDM pipe boot flashing accessory. These are specifically designed to suit a range of pipe sizes and can be adjusted easily on-site. Find out more and buy an EPDM pipe boot online.
Ready to Get Started?
EPDM Products to Buy Online
- Complete Flat Roof Kit (includes membrane, adhesive and trim)
- EPDM Membrane Cut to Any Size
- Roofing Adhesive and Rollers
- Edge and Gutter Trim
- Seam Tapes and Outlets
- PIR Insulation Boards
- Accessories and Tools
Related News from the PermaRoof UK Blog

Ask the Experts: How to Fit a Rubber Roof
‘How to fit a Rubber Roof” is one of the top questions we get at PermaRoof UK from DIYers. The system is fast and easy to install, perfect for DIY and we provide standard and cut-to-any-size
Ask the Experts: How to Waterproof a Plywood Roof
‘How to waterproof a plywood roof’ is our speciality here at PermaRoof UK and we’re happy to give our customers all the support they need. From the very start, we offer advice about measurements, preparation and

Triple Threat Warning for Flat Roofing Ahead of Storm Goretti
Roofing experts have issued a warning to homeowners about the danger of potential damage to flat roofs as Storm Goretti moves across the country this week. In a ‘triple-threat’ scenario, the fast-accumulating heavy snow, fluctuating temperatures and high
Get in Touch
Please leave your details and someone from the PermaRoof UK team will be touch shortly to help you with your enquiry.
Permaroof UK® Ltd
Unit 1
Westway
Cotes Park Industrial Estate
Alfreton
Derbyshire DE55 4QJ
Tel: 01773 608 839
Fax: 01773 608 408
Email: Click here
Registration No. 4109502
VAT No. 764 2785 00
Permaroof (UK) LTD
Opening Hours
Mon – Fri (8am / 5pm)
We are closed on bank holidays and we re-open the following working day at 8am. Feel free to send us your enquiry during these periods and we can get back to you.
CONTACT PERMAROOF UK
PermaRoof UK are on hand to answer any questions regarding our products, services or your order. We welcome enquiries from the trade, stockists and homeowners alike. Contact PermaRoof UK today using the below form and one of our experienced team members will be on hand to help you right away.
Permaroof UK® Ltd
Unit 1
Westway
Cotes Park Industrial Estate
Alfreton
Derbyshire DE55 4QJ
Tel: 01773 608 839
Fax: 01773 608 408
Email: Click here
Registration No. 4109502
VAT No. 764 2785 00
Permaroof (UK) LTD
PermaGroup Brands, Partners and Clients
PermaGroup has established links with some of the biggest names in our industry thanks to our reputation of excellence. Read more about becoming a supplier or stockist here.


